So, what are you waiting for? Let’s Start Installing Microsoft Exchange Server 2013!
It is understood that you have already installed Windows Server 2012, and promoted the server as a domain controller, and the DC needs to be the Global Catalog Server. Since we are installing everything in one server, and it’s a Demo/PoC machine, so we are allowed to test J
The PDC (Global Catalog Server) must have the following installed prior making it a Domain Controller:
I will be installing Microsoft Exchange Server 2013 on top of Microsoft Windows Server 2012 in a single machine. This will be a clean install with no previous exchange server installations whatsoever. If you want otherwise, have at least a Win2k8R2 SP1 build machine and have it configured as a Domain Controller and another member server required if you wish not to install the Exchange on the Domain Controller.
Things you should know about Exchange Server 2013
Before you start installing on a demo machine, have a look at the following link @ Microsoft TechNet where Exchange Server 2013 Installation Prerequisites are lined up:
http://technet.microsoft.com/en-us/library/bb691354%28v=exchg.150%29.aspx
The hardware requirements vary depending on where you are going to install the Mailbox or CAS roles or whether the server is physical or virtual. Review the official Exchange 2013 System Requirements located below:
http://technet.microsoft.com/en-us/library/aa996719.aspx
There is also a deployment assistant found in the TechNet site: http://technet.microsoft.com/en-US/exdeploy2013/Checklist?state=1839-W-AAAAAAAAQAAAAAEAAA~~
You can install Exchange Server 2013 in three different flavors:
- Install Exchange Server 2013 as a CAS Server
- Install Exchange Server 2013 as a Mailbox Server
- Install Exchange Server 2013 as a CAS+MBX Server (all in one box, a real work horse)
Now let’s take a look at the architecture of the new Exchange Server 2013:
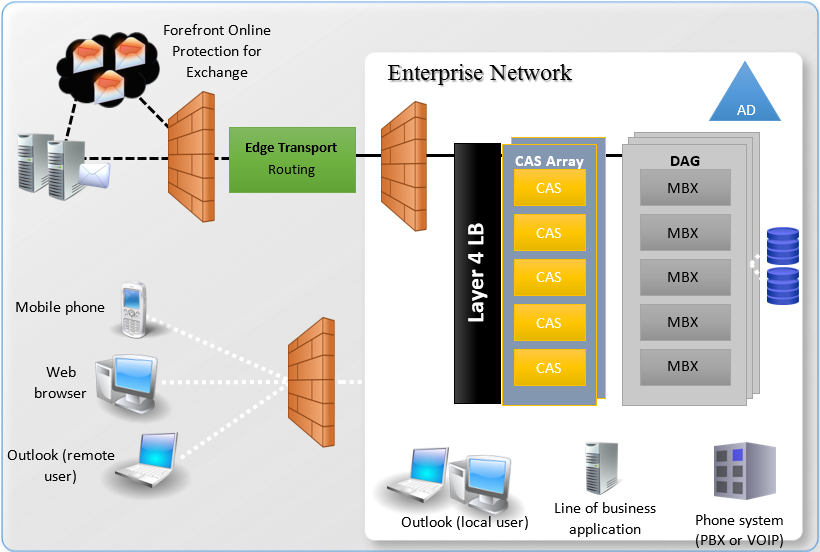
Exchange Server 2013 Architecture Poster: http://www.microsoft.com/en-us/download/details.aspx?id=39102
As you can see, CAS merely operating as a proxy server and the MBX is the real workhorse. You might have noticed that the Hub role no longer exists, if you are developing a larger scale exchange install then you would build a CAS server for authentication then install the mailbox roles on as many servers as you require to hold mailboxes for load balancing and performance. Now let’s concentrate into the software requirements of Exchange 2013 (things you must have installed prior installing Exchange Server 2013):
- Windows Server 2012 Prerequisites: Issue following commands in PowerShell one by one
a. Install-WindowsFeature RSAT-ADDS
b. Import-Module ServerManager
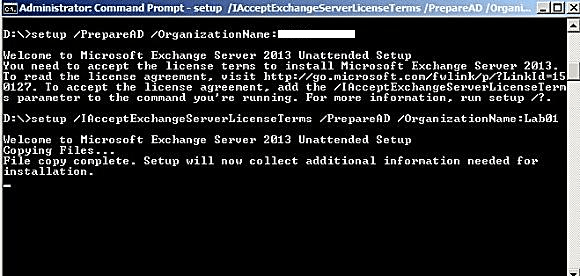
Run the c, d, e in Command Prompt, change directory to your Exchange Installation and run the following command as shown below
c. setup.exe /PrepareSchema /IAcceptExchangeServerLicenseTermsd. setup.exe /PrepareAD /IAcceptExchangeServerLicenseTerms (or use the command in the picture)
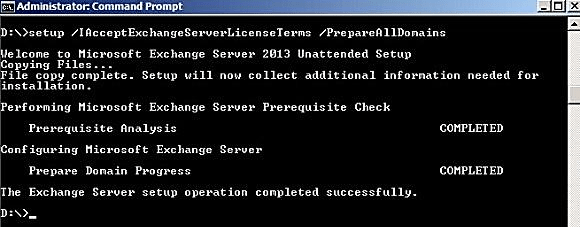
e. setup.exe /PrepareAllDomains /IAcceptExchangeServerLicenseTerms
More on AD Preparation: http://technet.microsoft.com/en-us/library/bb125224%28v=exchg.150%29.aspx
- Exchange Server 2013 Installation:
Install all the following software prior installing the roles and in the exact order:
- Unified Communications Managed API 4.0 Runtime
- Microsoft Office 2010 Filter Packs
- Service Pack 1 for Microsoft Office Filter Pack 2010
Mailbox Server Role or Combined CAS & MBX Roles: Open up PowerShell and issue the following command
Install-WindowsFeature AS-HTTP-Activation, Desktop-Experience,
 NET-Framework-45-Features, RPC-over-HTTP-proxy, RSAT-Clustering,
 RSAT-Clustering-CmdInterface, RSAT-Clustering-Mgmt, RSAT-Clustering-PowerShell,
 Web-Mgmt-Console, WAS-Process-Model, Web-Asp-Net45, Web-Basic-Auth,
 Web-Client-Auth, Web-Digest-Auth, Web-Dir-Browsing, Web-Dyn-Compression,
 Web-Http-Errors, Web-Http-Logging, Web-Http-Redirect, Web-Http-Tracing,
 Web-ISAPI-Ext, Web-ISAPI-Filter, Web-Lgcy-Mgmt-Console, Web-Metabase,
 Web-Mgmt-Console, Web-Mgmt-Service, Web-Net-Ext45, Web-Request-Monitor,
 Web-Server, Web-Stat-Compression, Web-Static-Content, Web-Windows-Auth,
 Web-WMI, Windows-Identity-Foundation
Client Access Server Role: Open up PowerShell and issue the following command
Install-WindowsFeature AS-HTTP-Activation, Desktop-Experience,
 NET-Framework-45-Features, RPC-over-HTTP-proxy, RSAT-Clustering,
 RSAT-Clustering-CmdInterface, RSAT-Clustering-Mgmt, RSAT-Clustering-PowerShell,
 Web-Mgmt-Console, WAS-Process-Model, Web-Asp-Net45, Web-Basic-Auth,
 Web-Client-Auth, Web-Digest-Auth, Web-Dir-Browsing, Web-Dyn-Compression,
 Web-Http-Errors, Web-Http-Logging, Web-Http-Redirect, Web-Http-Tracing,
 Web-ISAPI-Ext, Web-ISAPI-Filter, Web-Lgcy-Mgmt-Console, Web-Metabase,
 Web-Mgmt-Console, Web-Mgmt-Service, Web-Net-Ext45, Web-Request-Monitor,
 Web-Server, Web-Stat-Compression, Web-Static-Content, Web-Windows-Auth,
 Web-WMI, Windows-Identity-Foundation
The command we have just issued in the PowerShell will prep up Windows Server 2012 for housing Exchange with necessary components. After doing the above exactly I have mentioned, please reboot the server. We are now ready to run the setup “Exchange-x64”, do so.
After extraction, it is recommended that you Download the updates, it may save you time later on if the installation fails because you did not have the latest software updates installed. The download could take significant amount of time depending on your internet connection speed, or you can choose not to download the updates also.
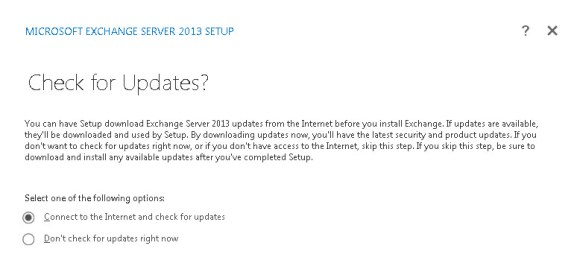
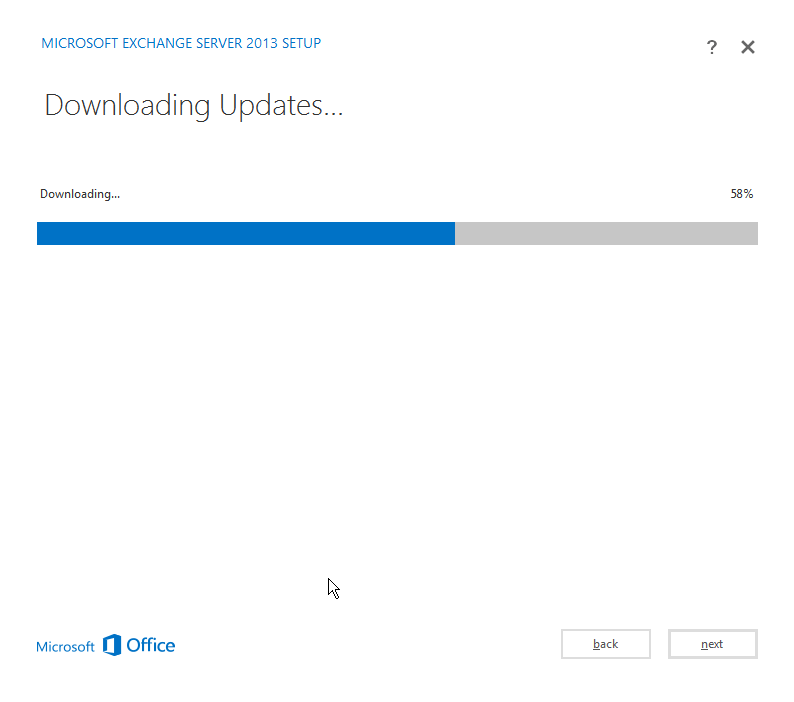
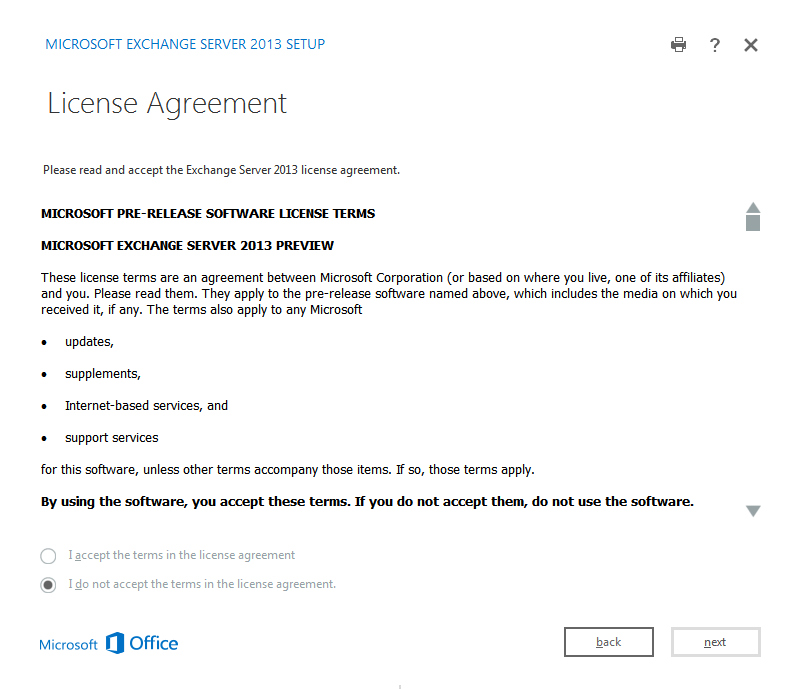
I am going for downloading the updates. Once the download completes you will click next and the License Agreement Screen pops up. Simply accept the license and continue by clicking next, if you feel otherwise, the installation is not going to continue. Afterwards you will see a menu which will copy all the files necessary to continue with the installation. And on the introduction menu, click next to continue after reading the setup introductions.
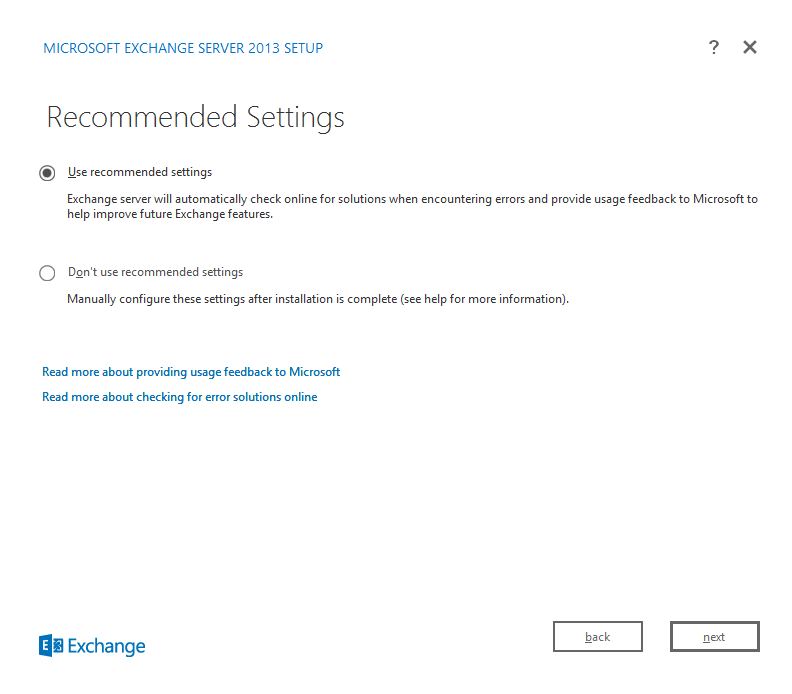
For the sake of this installation I will be continuing with the recommended settings
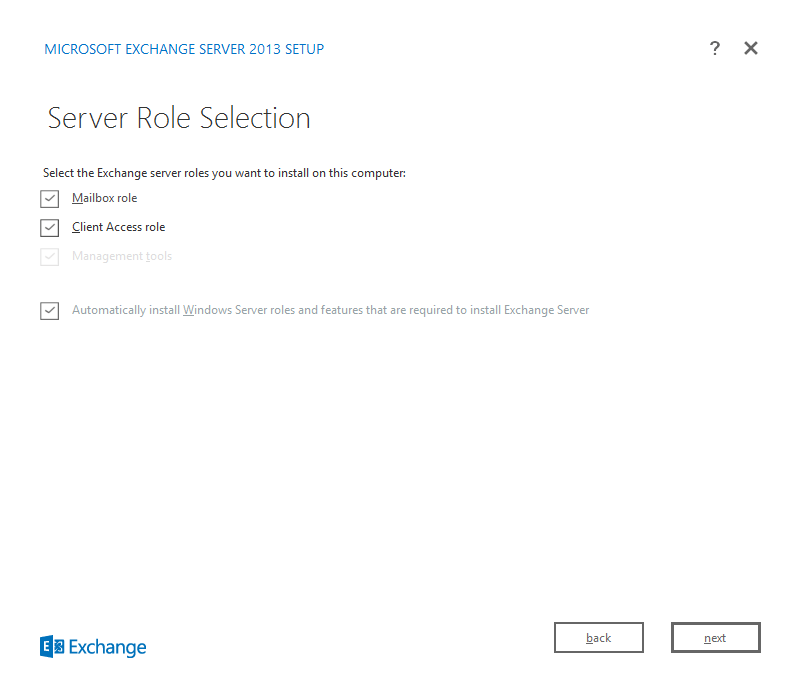
My environment does not require individual server installations and since this is test-bed so I will install all roles on one server. You will also notice the box that mentions “Automatically install any server roles that are required to install Exchange Server”. Leave this ticked as this installs and configures all the prerequisites that’s required for exchange 2013 such as IIS and .Net features, though we have installed it earlier, but we didn’t configure it right?.
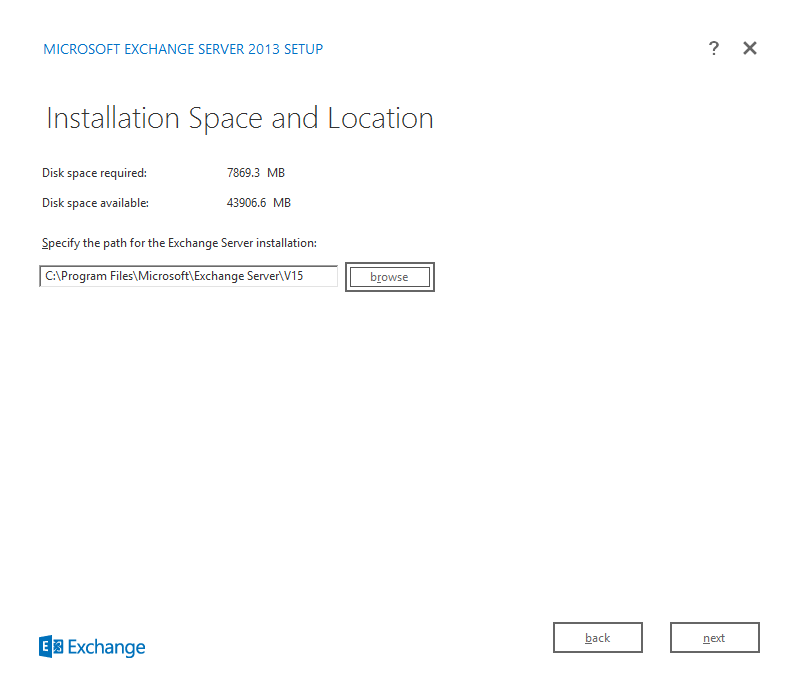
Next decide where to install Exchange Server 2013, I am going with the normal installation. But it’s a good practice not to install exchange on a partition that houses any Operating Systems. On a production server you should house the exchange on a RAID drive, at least be a RAID-5. The Exchange Server 2013 installation will take roughly 5gb or more, house it where you have space for the time being. Click on next to continue.
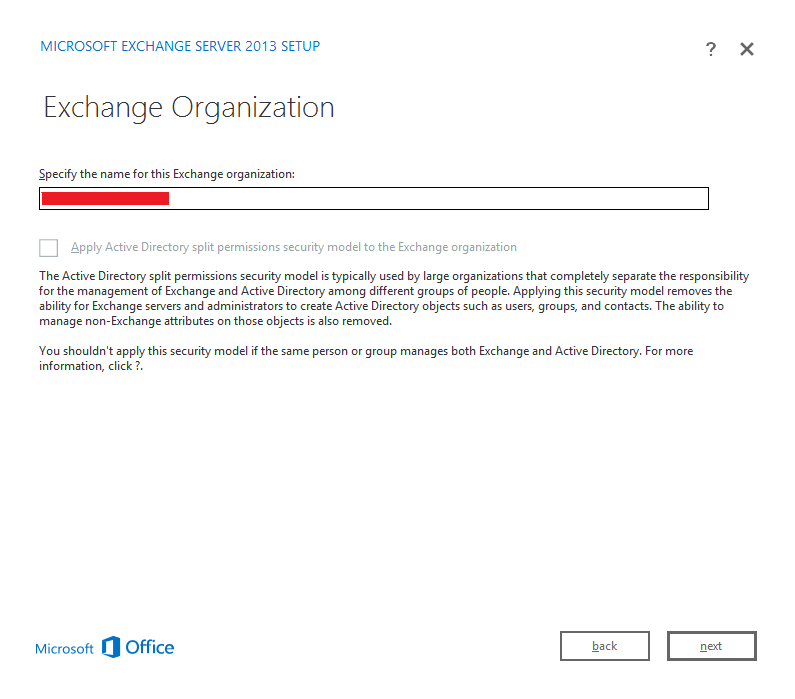
Next is an important decision point, make sure you have selected a suitable name (example: mail.mobs-bd.org) for your exchange 2013 organization. Make a note of the option to setup split permissions. In a large production environment you may want to enable this so that you can give Exchange Administrators different levels of administration privileges.
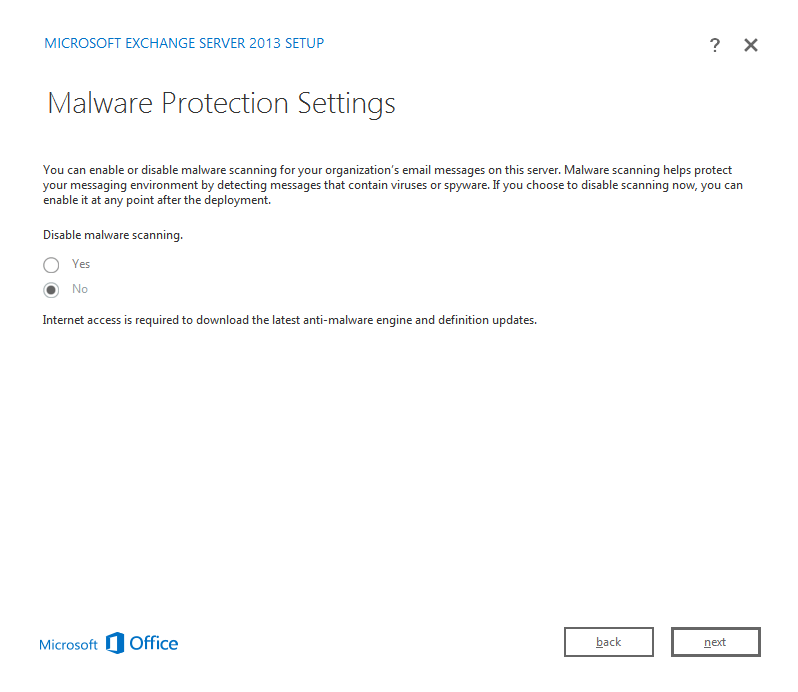
Exchange 2013 has built-in malware and spy-ware scanning, previously you had to enable this with some PowerShell after the install, here you get the option to enable it automatically before the total installation takes place. But I am enabling this right now, taking the advantage.
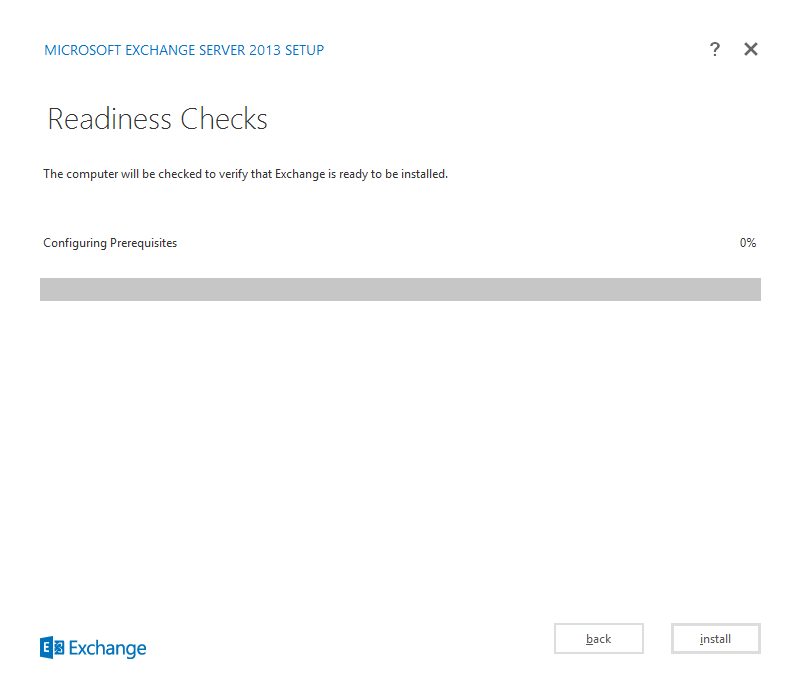
This is where Exchange 2013 will check for all the prerequisites and warns accordingly. Since we have installed all the with prerequisites prior starting the installation and restarted the machine, all information really got in effect. So move ahead and install the prerequisites. This could also take some time to check, as you don’t want to haste….let it be.
Exchange 2013 will now prepare the organization. You can see the progress in steps, tiresome to watch at this stage. The process gets completed after step 15.

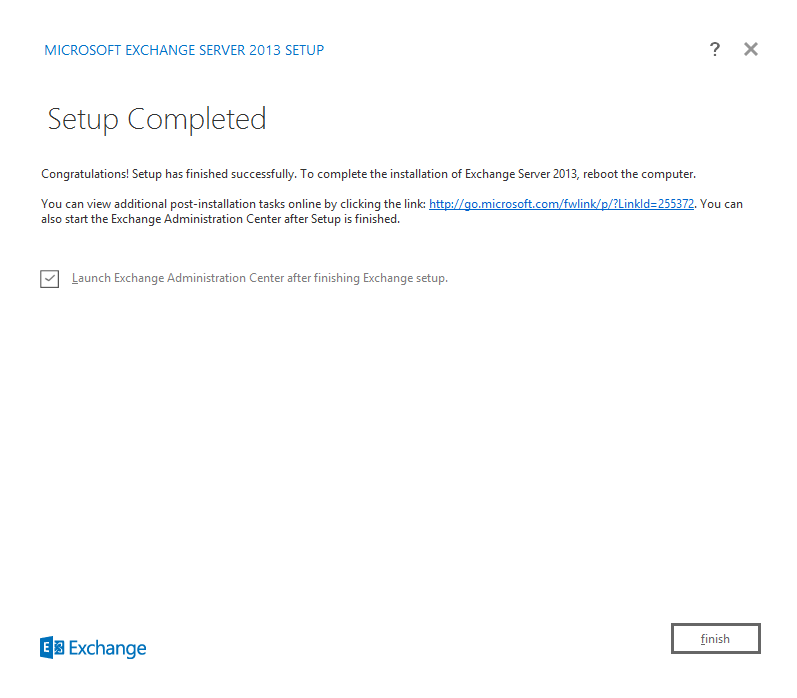
This again may take upwards of 30 minutes depending on your server. Once Exchange Server 2013 gets installed you will see the completion screen. Run the EAC, a first look.
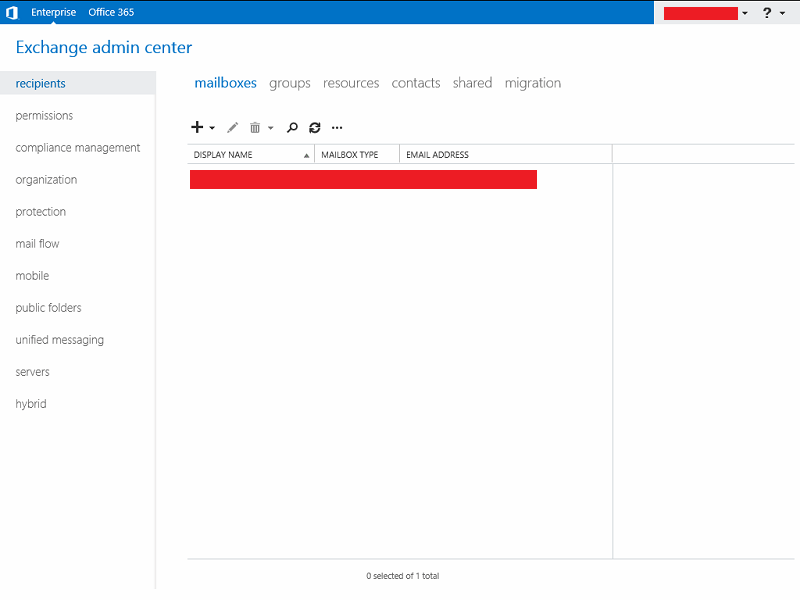
Now log into your Exchange 2013 EAC (you will be asked of your Time Zone, Language selection). Afterwards, you might want to check out the following, since we haven’t configured the server yet:
- Enter Product Key
- Configure Mail Flow and Client Access
- Verify an Exchange 2013 Installation
- Install the Exchange 2013 Management Tools
And this is where I left off….tired.